When it comes to using digital images to enhance your teaching, do you immediately flashback to the day your computer froze like the Arctic tundra, leaving you cold? Does that same chill return as you recall trying to download a music file only to find, when you hit the play button, nothing happened? When it comes to using the computer in your teaching, do you adopt the philosophy of “I will learn it, but not now.” I had this same mindset until I discovered digital storytelling.
LEAVING ONE’S COMFORT ZONE
As a professional storyteller for over 24 years, I had my own ideas about what constituted effective storytelling. Because I had experienced the awesome power students have when they use their voices to share stories, I was reluctant to embrace digital storytelling at first. How could digital images, sound files, and words be combined to create the same experience as orally telling a story? Simply put, they cannot. They can, in fact, transform story to a whole new experience, altogether just as valuable. Story can be reshaped and remade with digital tools. In this article, I demonstrate ways to prepare a digital story through the eyes of a storyteller.
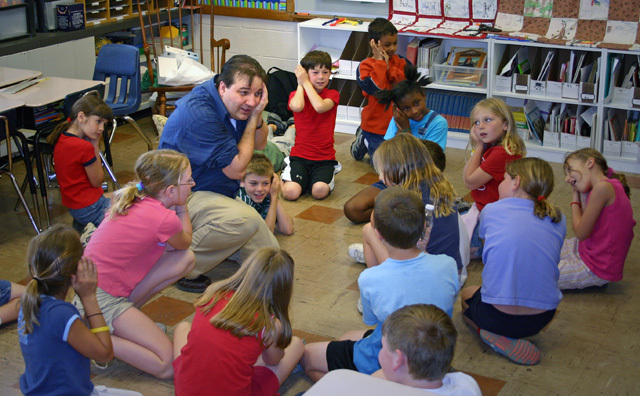
Kevin works with a group of students to develop stories. Photo courtesy of Kevin Cordi.
When introduced to digital storytelling, I feared I would be buried in terminology and technicalities. I was pleasantly surprised to see, after training with Joe Lambert, co-founder of the Center for Digital Storytelling, that story remained the central focus. As with traditional telling, story is the most vital component when developing effective digital storytelling.
As teachers, we often veer away from creating digital stories because we are weary of the digital. If one simply learns the various programs used for digital storytelling (Movie Maker, Pinnacle, PowerDirector, and iMovie), it is easy to become lost in the technology. Remember, pay attention to what you are creating—a story—not the technology. The technology serves as tool to build story.
TIPS TO CREATE EFFECTIVE STORIES
I offer six tips to create effective stories digitally or orally.
- Stories are gifts. Cheyenne storyteller Lance Henson once told me that stories are gifts; it is up to us to take them. Initially, teachers may have connected storytelling to something that required bravery to do. We should never tell children they were brave to create or tell a story; this instills a sense of fear in publicly sharing narratives. However, if we tell them their gift was unique and appreciated, we send the message that they, too, are unique and appreciated.
- Stories are not to be memorized, but experienced. Stories are to be told and shared, not memorized word for word. They should be told differently each time. Students often want to memorize story, sometimes stripping the pure, individual energy that comes from shaping a story to work for the teller.
- Telling stories requires practice and more practice. Provide students with opportunities to see their story in many ways. They can write it down, tell it to a friend, tell it to their class, or tell it for another class. Students need to see how the story changes after each telling. By re-examining their work, they can see how they can develop their stories further.
- Discussing story development improves the story. Teachers should not simply have students tell their stories as a one-time experience. Instead, students should continue to use narratives in their classrooms. After each telling experience, they should discuss what worked and what did not. The best conversations occur when students talk freely. From those conversations, they revisit their stories and are able to self-review. Your job is to help them by giving them the space to make such reviews. Reach for this — you will be glad when it happens.
- Model storytelling with your students. I tell my students, “Everyone can tell a story.” However, I practice it as well, often telling stories myself. Some teachers are reluctant to share a story because they think they will mess it up or not do it right. There is no one way to tell a story. Teachers can share everything from recalling their day to telling a story about the book they are about to read for the students.
- The more one risks with play, the better the story. I have developed a program called “Permission 2 Play” to encourage teachers to provide spaces for students to play with their story development. The program draws from process drama; teachers enter a story alongside their students, imagining and enacting the fictional world the student is telling. I encourage teachers to use their imagination and to take risks together with their students.
DIVING INTO DIGITAL
I have incorporated digital storytelling into my telling and teaching. My students have created advertisements for their favorite books and reviews of their favorite web sites. They also have used digital means to represent their understanding of what they read. I still recall when my students used Teenage Mutant Ninja Turtles action figures to retell The Odyssey. Imagine using digital storytelling to show the formation of a volcano, the metamorphosis of a butterfly, or the extent of the polar ice caps. In order to do this, you must dive into the digital.
Planning the story
First, plan the story you wish to tell with tools from your digital toolbox — including words, images, sounds, videos, and transitions. As you plan your story, consider how you will use these tools together to support your story.
Words: Decide on a basic outline of the narratives you will share in the digital story. However, remember this is an outline and allows for the flexibility and freedom to change the script. When you add other tools such as audio, video or new perspectives, the words can and often do change from the initial script. Words are used sparingly in digital media. Because of this, make every word count. Digital story is not like creating a movie, but more like creating the trailer.
Images: Unlike an orally told story, your digital story can have images everyone can see. But, you should use images only if they extend or heighten the story. You can draw from free image sites or use digital cameras or scanned images to support your story. Choose images carefully and do not overload the eye. Too many images can distract from the story.
Sites with free images, including photographs and drawings —
- Public-Domain-Photos.com
- Public Domain Cliparts
- 4 Free Photos
- Photos8.com
- BestPhotos.us
- Ars Publik
- Freestockphotos.biz
- Public Domain Pictures
- Google(LIFE Photo Archive)
Sounds: When creating digital stories, you can have more than one storyteller. You can include your students’ and others’ voices with a digital voice recorder. The digital recorder should have a USB port so sounds can be downloaded and edited.
Royalty-free music files are available at these sites:
- Freeplay Music
- Soundzabound.com – Royalty Free Music For Schools
- MagnaTune
- Last.fm
- Partners in Rhyme
Video: If you use video clips, think of the video as a part of the story. What are the best parts that you want to use? A good rule of thumb is to choose short but detailed video clips. You can find out more with the digital tutorials listed at the end of this article.
Transitions: Here is the glue to an oral or a digital story: How do you blend one part of the story with another? In a digital story, you can announce changes in thoughts and ideas with words, spoken or written, and with simple fading or cross fades that show visually what will appear next.
Continuity: Most important is continuity of the story. You need to have a defined introduction and conclusion. In the introduction, how will your tools (words, images, sounds, video, and transitions) help you begin the story or stories you are sharing? Just as a told story doesn’t end with the words “The End,” the digital story must recapture or provide a final touch at its closure. You can do this with all your tools — words, images, sounds, and transitions.
After the story, learning the programs
After you have planned your story, you need to spend time with your computer programs. The free programs on the computer are IBM Windows Movie Maker and Mac’s iMovie. You will need to know how to:
Import: Both Movie Maker and iMovie have the ability to take an image, sound file, or video file and put it in your program. Search for “how to import” in the help directory and you will be on your way in no time. Basically, the image will be placed in what is often referred to as collections. From the collections you can pull imported files and place images, sound and videos into your story.
Edit: Use the editing tools to delete or add image or sound files and manipulate them so they work with the story you create. Just like when you write a story, you have the ability to edit.
Publish: Both programs can be saved to a DVD so you can watch your story on a DVD player, upload it to sites like YouTube, or save it as an MP4 file
Tutorials for using programs and tools:
- Center for Digital Storytelling Tutorial for iMovie5 (PDF) (Macintosh OS X)
- Online tutorial for Movie Maker2 (Windows XP)
- Online tutorial for Photo Story (Windows XP)
- University of Houston Tutorial for Photo Story
- Online tutorial for Audacity
- University of South Florida’s Tech-Ease Audacity Video Tutorials
- Updated tutorials for Audacity (audio editing)
- Apple iLife Online Tutorials
- Digital Storytelling: A Tutorial in 10 Easy Steps
The purpose of this article is to help you see the value of telling your story before learning the technology. I hope you are encouraged to use sounds, videos, and images to enhance your storytelling skills. This process has changed my teaching. I hope you too are able to experiment with new ways of using story by taking a risk and diving into the digital story.
LINKS
How to Create Simple Digital Stories
An overview of digital stories and how to create and evaluate them.
Digital Storytelling
Links to a variety of resources, including digital storytelling in education, digital family stories, and international digital storytelling.
This article was written by Kevin Cordi. For more information, see the Contributors page. Email Kimberly Lightle, Principal Investigator, with any questions about the content of this site.
Copyright April 2010 – The Ohio State University. This material is based upon work supported by the National Science Foundation under Grant No. 0733024. Any opinions, findings, and conclusions or recommendations expressed in this material are those of the author(s) and do not necessarily reflect the views of the National Science Foundation. This work is licensed under an Attribution-ShareAlike 3.0 Unported Creative Commons license.